

You will need:
- Foam stickers or shapes (if you want to know where to get them from, have a look in the hints bit at the end of the tute).
- Foam board, 3mm or 5mm (again, hints on where to buy at the end)
- Ruler and pencil
- Scissors or craft knife
- Glue (if you have foam shapes, you won't need it if you have foam stickers).
- Fabric paint
- Paintbrush
- Fabric to test on
- A new t-shirt / bag / tea towel / cushion cover for your final design
Choose the foam shape or shapes that you want to use for your stamp. Check the surface of your shape for any bumps or dips - this flower was a bit wiggly on one side, so I made sure I glued that side rather than printed with it, as even small blips can show up when you print.
Work out what size piece of foam board you need to cut. Try and have as little white space as possible around your foam shape, that way you'll know exactly where you will be stamping - if you have a weeny shape in the middle of a huge piece of foam board it'll be hard to know exactly where to place your stamp.

Cut your piece of foam board with a craft knife or scissors, and stick your shape on. Make sure you use a decent glue so the stamp will last longer.
Ta daaaaaa! That's it. But if you want to get the best out of your lovely new stamp, please read on.
This bit is important: Test your stamp. Find an old t-shirt or vest and play around with your stamp first. Try out different fabric paints with it, work out which way round is the best, etc etc. You'll find that your stamp comes out differently depending what fabric you're stamping on to. So if you want to print on a t-shirt, use a scrap piece of jersey to test with, if you want to print on a pillowcase, find some cotton. You get the idea :)

Prepare your surface for stamping. Wash your vest / tea towel / pillowcase before you stamp on it. A lot of fabrics are finished with chemicals that can reduce fabirc paint absorption, so make sure your fabirc is clean first. Iron, iron, iron. Any little wrinkles can cause blips in your stamping, and you don't want that. Use guides if you want to do things in straight lines - I ironed munchkin's top down the middle and then centred my flower over the ironed line, and for lettering I use masking tape as a guide.
 Make sure your stamp is totally covered with fabric paint. The easiest way to tell if you've done this is to hold the stamp up to the light:
Always clean around your stamp before you print with it. See that bit of red on the foam board in the picture below? See the teeny red splodge next to the flower on the t-shirt? I

And while we're on the subject of

Make sure you follow the instructions for fixing your fabric paint. If it says iron for five minutes, then iron for five minutes (yes, I know it's really boring ironing the same small patch of t-shirt for five minutes, but it's worth it). If you've made a mistake, for example by waving your paintbrush around and catching the arm of your t-shirt with a big splodge of red paint, then I'd suggest it might be best to start again on a clean t-shirt. I've tried all sorts of things to get fabric paint out (even if it hasn't been heat sealed with an iron), and it's bloomin difficult.

Where to buy: Foam shapes seem to be everywhere - most craft shops stock them, and I've found lots of different ones in Tesco, mainly seasonal (Easter, Christmas etc.). I've even picked some up in pound shops in the children's art bit. Remember lettering will come out in reverse, so foam alphabet stickers aren't great unless you like mirror writing.

Foam board can be a bit harder to come by. eBay is probably the easiest way to buy it, although not the cheapest. If you're buying in bulk then Paperstone, Discount Graphic, and Art Discount all sell it by the box. Rymans sell it too, although it might be worth giving your local stor a ring first to see if it's in stock.

A final word on fabric paint. It's worth investing in decent stuff, because it can have a huge effect on your end print. I like Colourcraft paints (although their website isn't great), and I love Stewart Gill paints, especially the True Colour range.

There you go, pretty much everything I know about making and using foam shape stamps, in a blog post. Easy peasy lemon squeezy!


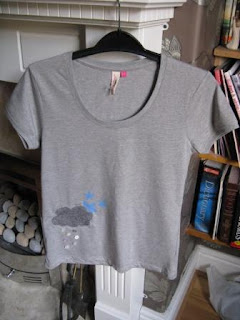


 Finally I re-shaped it by sewing a new seam from the armpit to just below the bust. Initially I sewed it all the way down to the bottom of the shirt, but when I tried it on I remembered I had hips. Doh! So I had to unpick the seam, but I quite like the holes it left behind, and I left the excess material so it makes a little pleat. I cut a bit off the bottom to make it shorter, and tadaaa! I quite like it. Now I just need some sunshine so I can wear it...


